
It's the Simple Things
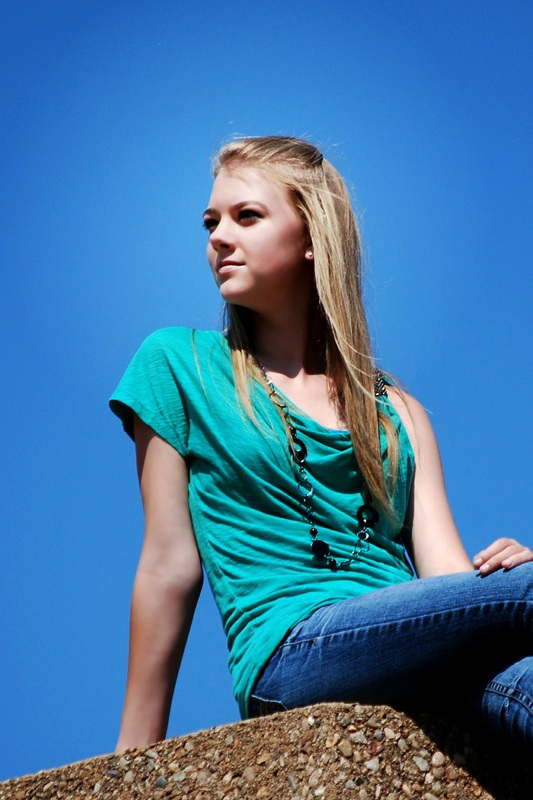
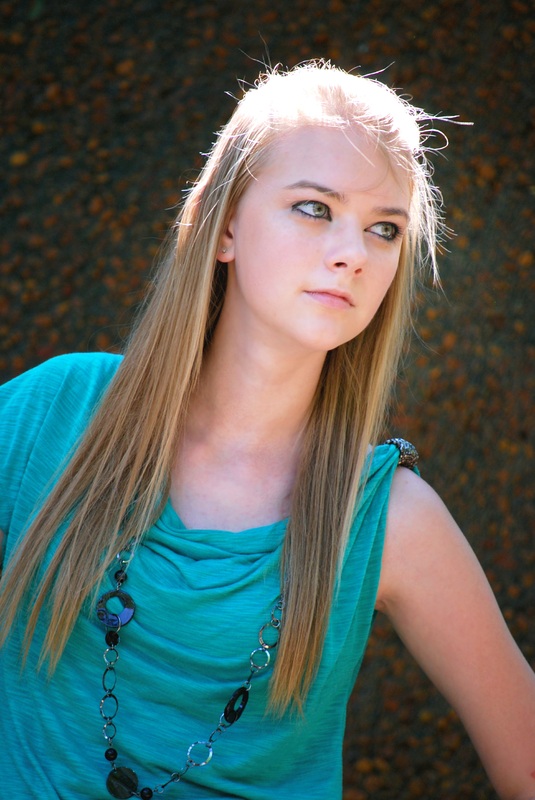
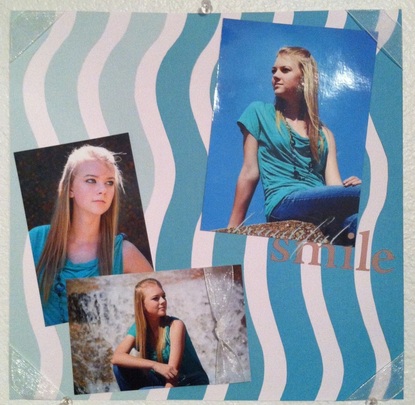 Two blog posts in one week. I love this time of the year, as it is the only time I really have to craft. I just now got around to creating this page, even though I took these pictures 2 years ago. They are of my cousin Alexis. I wanted to use the colors in her shirt, which is a beautiful aqua color; it looked so fantastic next to the bright blue Texas sky. I found a paper pack by DCWV with three shades of aqua, that were a perfect fit for this page. I cut the waves out of the paper using my cricut and attached them to a solid white background. Then I added the pictures, the title (which is a rub on) and the sheer ribbon just for some texture. I love the colors and calm of this layout. Materials Used: Paper: DCWV - Brillants and Brights Textured Cardstock Stack Cricut: Craft Room Basics Title: "Beautiful Smile" - My Minds Eye Ribbon: Simply Sheer White by Horizon Ribbon Challenges Entered: Lasting Memories Take a look at the pictures from the photo shoot. I took these pictures in June 2012 at the Fort Worth Water Gardens. 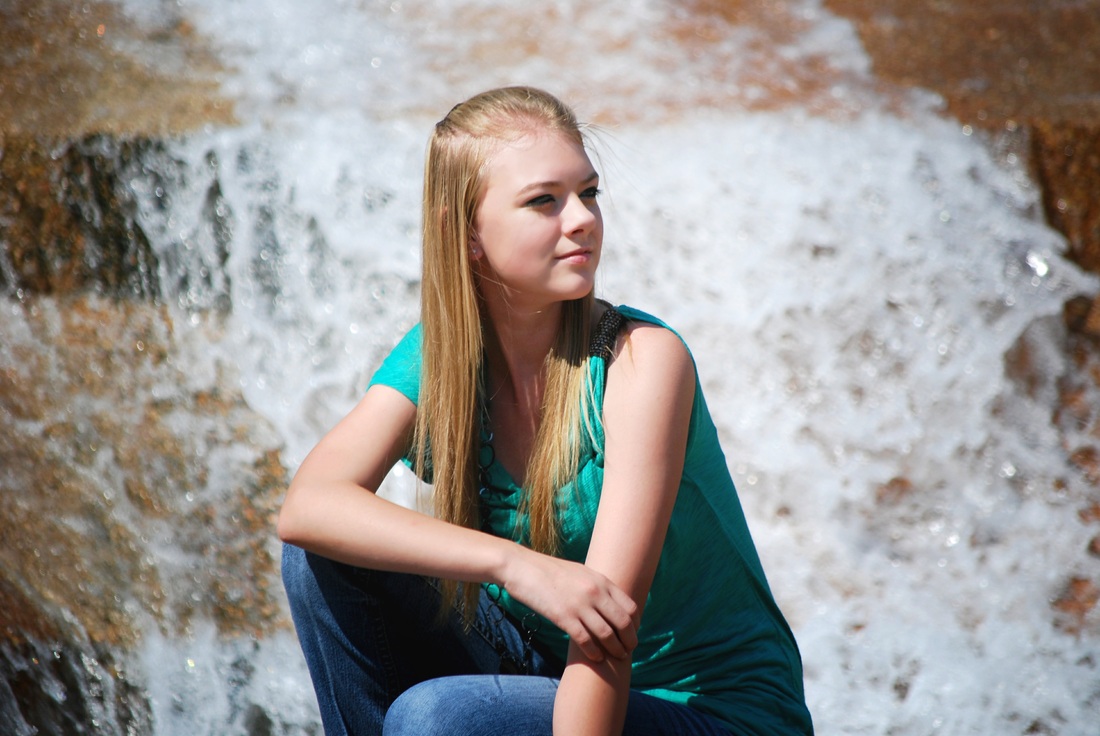
2 Comments
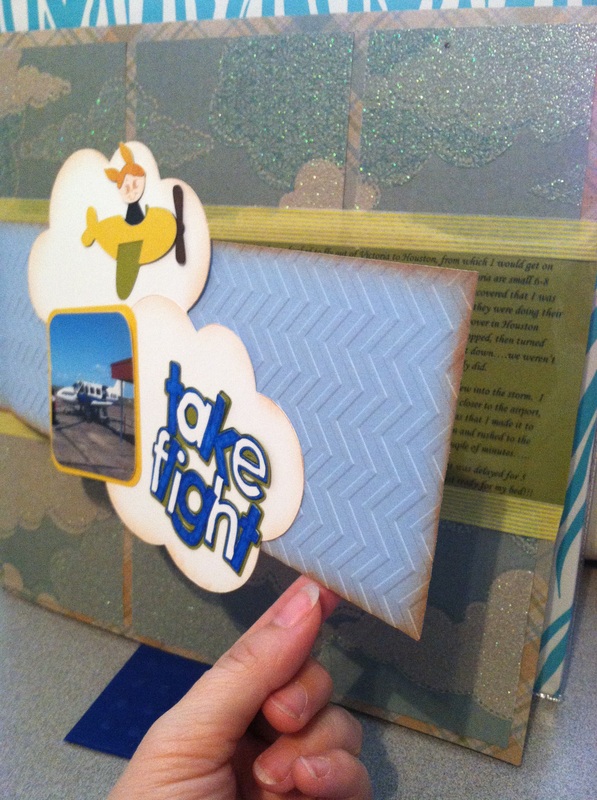
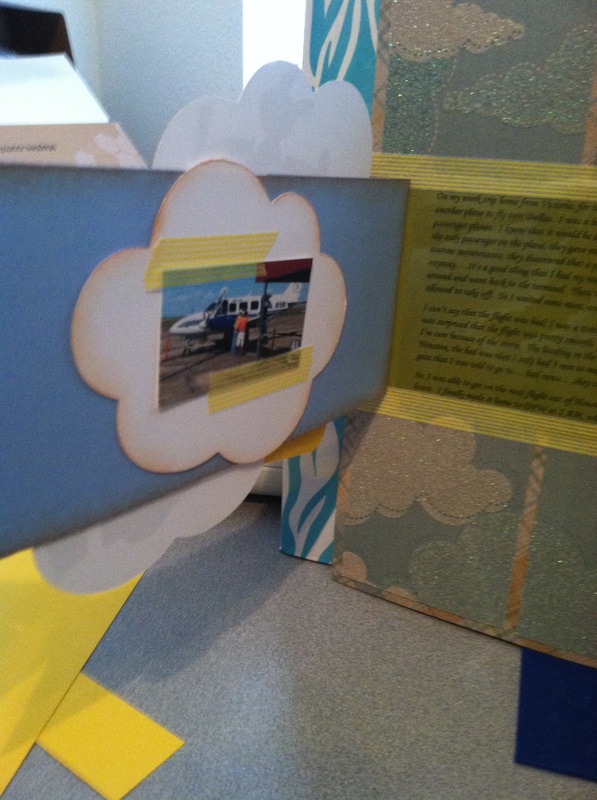
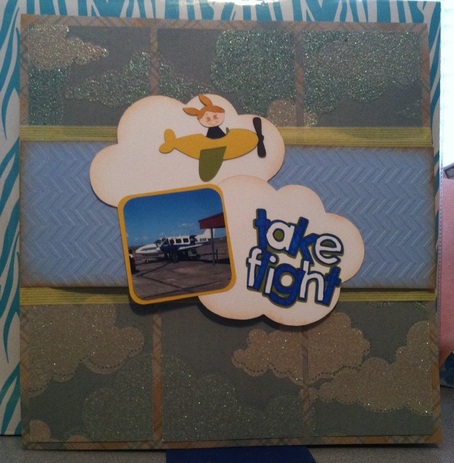 What do you do when you have a great story to tell, one that you want to preserve in a scrapbook, but don't really have any pictures to go along with it? I choose to create a scrapbook layout that will focus on the story, and use decorative items to create a beautiful page. That is what happened with this page. It is about my journey from Victoria to Houston to Dallas, which was quite a trip. Let's just say it involves a 8 passenger plane, a storm over Houston, and a lot of waiting around in airports. I only had two small pictures, and they weren't very good pictures at that. So, I did a lot of journaling, which you can't see in this picture, but you can see where I hid it below in the next set of images.
Materials Used: Cricut: Beep Beep, Craft Room Basics, & Simply Charmed Paper: DCWV - The Playtime Stack Ink: Tim Holtz Tea Die Distress Ink Stamp: Peachy Keen Face Stamps Cuttlebug: Darice Chevron Embossing Folder Other: Spectrum Noir - EB5, TB6, & FS6; Blue gelly roll pen, Recollections yellow strip washi tape, & transparent sheet with journaling on computer. Challenges Entered: Die Cuttin Divas Paper Playtime Frosted Designs Scrappy Mom Stamps My Craft Spot Cuttlebug Mania  Blog Update: December 11, 2013
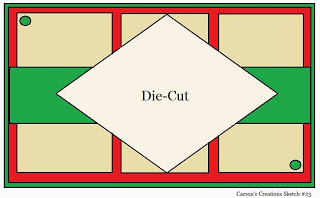
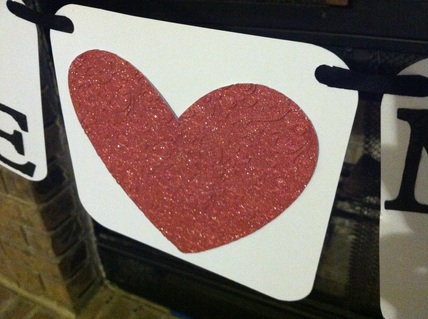
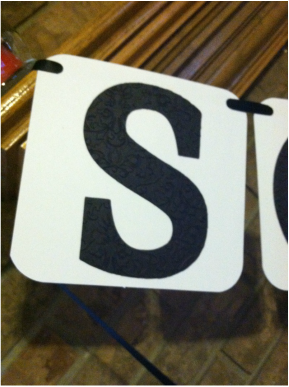
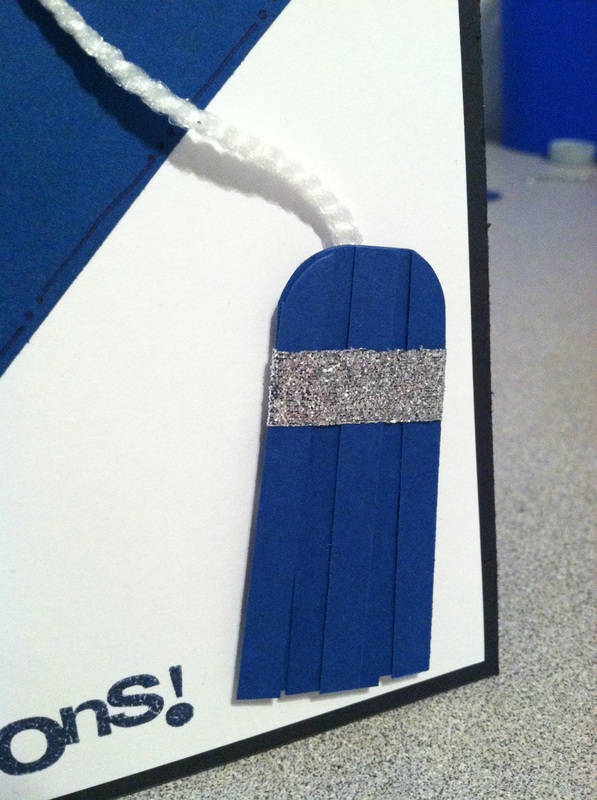
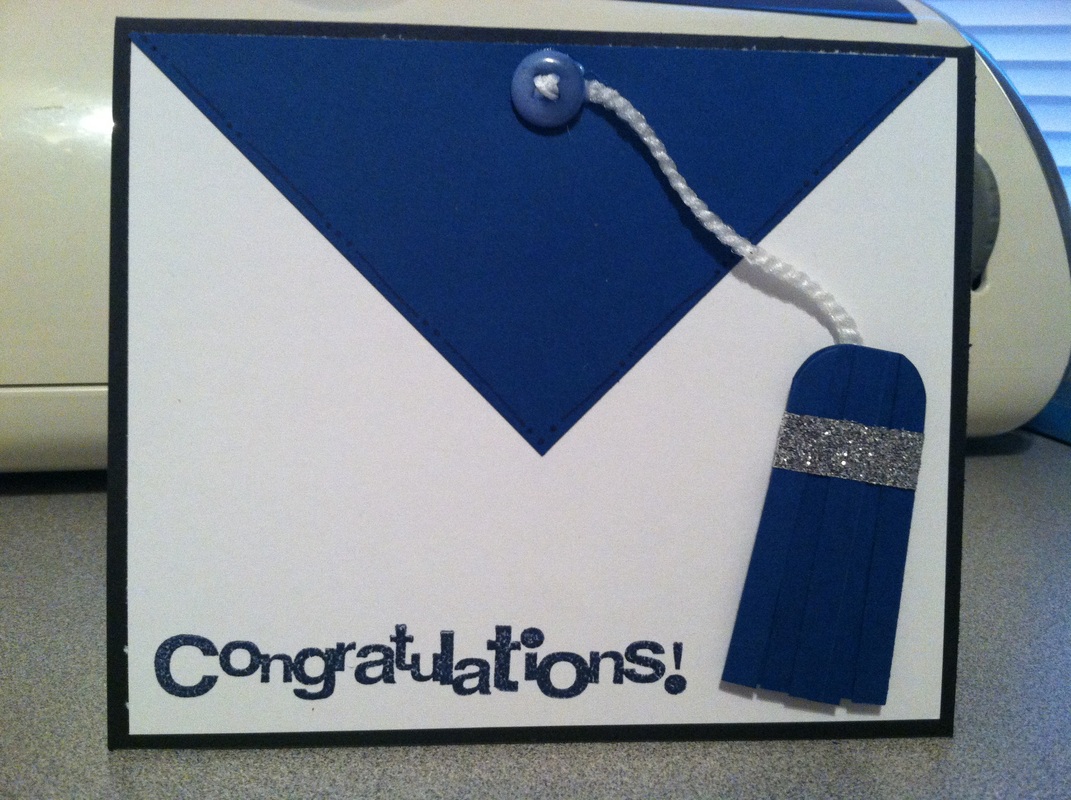
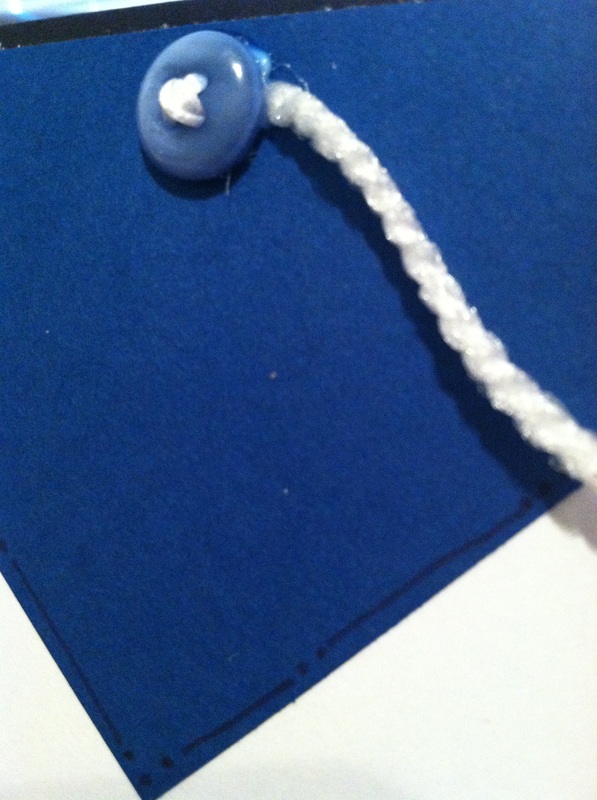
My Take Flight Layout was showcased on the Die Cuttin' Divas challenge site. This was a sketch challenge, that I don't normally participate in, but this one really inspired me :)  A good friend of mine asked me to make a banner for a bridal shower that she was helping to plan. She wanted a banner that said "Soon To Be Mrs. Gulley," clean, simple, and elegant. I cut the banner in white cardstock, using Craft Room Basics. I used a rounded corner square, then added a small circle in each corner, so that they would all match. There is nothing worse than trying to line up the holes using a hole punch. Next I cut the letters and the heart (in pink sparkle paper) using Plantin Schoolbook, and embossed them using a Damask Darice embossing folder. Then it was as easy as attaching everything together and stringing it all using a black satin ribbon. Come to find out, I forgot the E in Gulley, so I had to come back and make another, but that was easy enough since I had saved the file in Craft Room.
Materials Used:
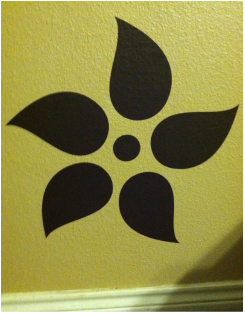
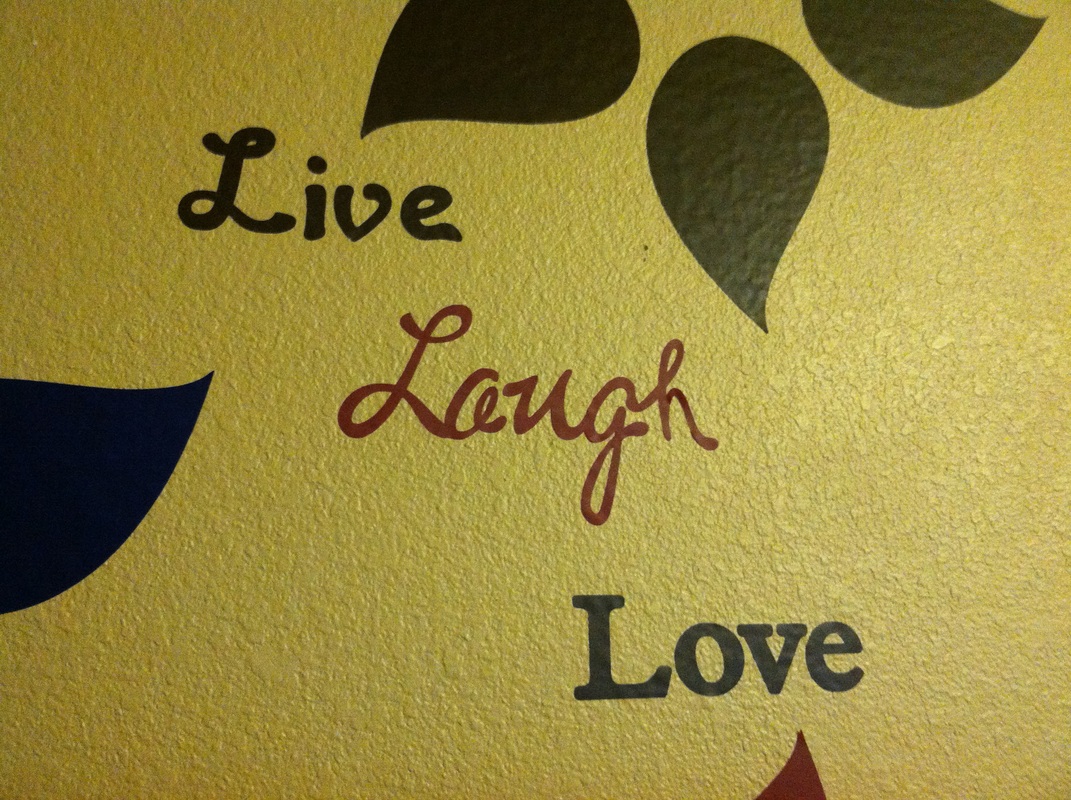
Cricut: Plantin Schoolbook & Craft Room Basics Cuttlebug: Damask Darice Embossing Folder Paper: DCWV the glitter cardstock stack & Recollections cardstock Ribbon: Black Satin Ribbon (don't remember where I bought it, but it was prob. Jo Ann's or Michaels) Challenges Entered: Hiding In My Craft Room Paper Playtime Frosted Designs My Craft Spot Welcome to Create with JoNeita and the FCCB Vinyl EDU Cricut Crawl - Fantabulous Cricut's version of a Blog Hop!!! This week we are challenging you to create a project using vinyl you have cut using your Cricut. We have a fabulous sponsor, Cricket Vinyl Supplies. If we get 100 participants in this challenge, our sponsor will give a Cricut Expression package that includes a Cricut Expression machine, deep cut blade, Jasmine Cricut cartridge, ten 12' X 12' assorted sheets of matte vinyl and one 12' X 12' gridded transfer tape. How exciting is that? If you have come from Heather's blog, Scraping Runner Creations, then you are in the right place! If you've just happened across my blog and would like to see all the fabulous Design Team creations, head on over to Fantabulous Cricut Here to start at the beginning. Make sure to check out each DT member's blog. There will be Blog Candy along the way at ALL of our Design Team members' blogs, and don't forget about the Grand Prize up for grabs at FCCB for one participant who submits a vinyl project at FCCB! 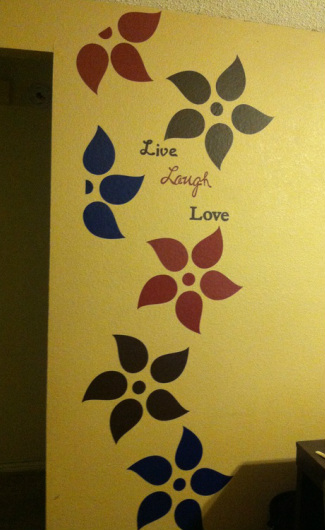 I had never worked with vinyl before, but had been wanting to create a piece of wall art for this blank space on the wall in our living room. It is right as you walk into our hallway, so it was a glaring blank spot yelling for a big bold graphic. I was surprised at how easy it was to use, and I think I am addicted now. I wanted it to be big (floor to celling), and I was having trouble getting pre-made images cut big enough, so I decided to make my own. It was actually a lot easier than I though it would be. The flowers were cut using a circle from Craft Room Basics, cut at 2.139 high, and the petals are cut using the layer (Bird 2) from Create A Critter, cut at 7.5 in high. I just really liked the shape of the wing and thought that it made a great country flower with a modern touch to it. I cut the flowers out in blue, brown, and a deep red. I know the wall color looks yellow, but it is really more of a tan color and the vinyl colors look great on the wall. I felt that it needed something more, so I decided to cut "Live, Laugh, Love" out and add it to the piece. I cut "Live" using the Type Candy Cartridge, standard font at 2.5 in high. "Laugh" was cut using the Type Candy Cartridge, Sugar Script font at 4.75 in high. Then "Love" was cut using the Plantin Schoolbook cartridge, roly poly font, cut at 2.11 in high.
I hope that you have been inspired by my project. Now for some Blog Candy To be eligible for my blog candy, all you need to do is become a follower and leave a comment on this post. You can comment on my project, share a tip on how to work with vinyl, or tell me what project you are working on and linking up to FCCB. I would also love it if you would "like" my Facebook page. I will choose one winner using Random.org, and announce the winner on Monday. This winner will receive a goody pack, to include some stamps and an embossing folder. Your next stop is Jackie's blog, Luv2Scrapp. Make sure to visit all the stops along the way and when you get done, make sure you link up your project to FCCB's Fantabulous Cricut Crawl post!! Happy Crawling!! Here is the line up in case you get lost: Robin http://robinscreativecottage.blogspot.com Jilliene http://jillienedesigns.blogspot.com Heather http://scrappingrunnercreations.blogspot.com JoNeita http://createwithjoneita.weebly.com (You Are Here) Jackie http://luv2scrappp.blogspot.com LB http://www.coolbeansbylb.blogspot.com Connie http://www.conniecancrop.blogspot.com Amy T www.craftingwithamy.com Missy http://www.quickchickdesigns.blogspot.com Cindy http://www.cindyvernon.blogspot.com Rebecca craftingmisfit.blogspot.com Catarina http://blog.docerelashop.com/ Kim ogdendoll.blogspot.com Emily molliemugsblog.blogspot.com Amy HS http://thestampingtree.blogspot.com Ro http://rodonner.blogspot.com/ Lynn http://mycardsnstuff.blogspot.com Michelle http://justanutterpapercrafter.blogspot.com
 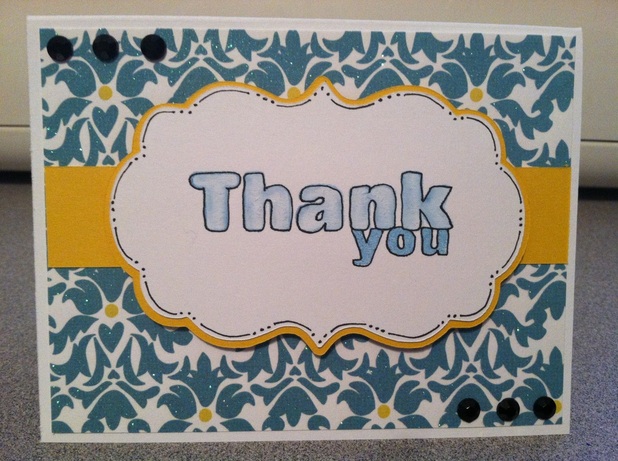 This is a quick and easy thank you card that, I think, would be perfect for anyone. I cut the scallop design using Cricut Craft Room Basics, then stamped "Thank You" in the center. I used my blender pen and some Stampin Up ink to fill in the letters, making a watercolor effect, which I love. Then I outlined the scallop and the letters using a black gel pen. Then I put it all together. The glitter back ground paper is beautiful and makes this card. I did lift the scallop using foam tape to give it some depth and added the black rhinestones to add a bit more sparkle. Materials Used: Cricut: Craft Room Basics Paper: Recollections cardstock and Everyday Moments paper pad. Stamp: Inkadinkado All Occasions Ink: Stampin Up Taken with Teal and a blender pen (blender pend used on the "thank" part) Challenges Entered: Die Cuttin Divas Paper Playtime D.L Art My Craft Spot The Paper Girls  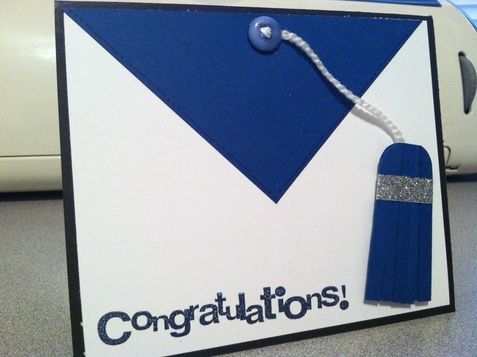
|

JoNeita & Dallas - Dec. 2021
About MeMy name is JoNeita Kelly and I have been crafting for at least the last 20 years. I live in Forney, Texas with my son, Dallas. I am a High School teacher and Cheerleading Coach. I love to craft and to continue to improve my photography and editing skills whenever I have free time. What I love most is telling our story using pictures, it is the most important gift I can leave my family. 
Photo by Steven Mackie Photography.
Categories
All
Archives
December 2021


Former Design Team Member for Fantabulous Cricut Challenge Blog
 |


 RSS Feed
